Count the number of contacts on an account in Salesforce
How many personas / contacts are identified on each target account and is your team following best practice? We share a great solution to keep track!
February 27, 2023
Revenue Operations
If you manage a sales team who are working with new inbound leads and you want to equally divide these, this is for you!


First off, what even is a round robin? In Salesforce CRM terms it refers to a method of evenly assigning leads to users within a team in a series or sequence.
For example, you have 5 SDRs (Sales Development Representatives) working with new inbound leads and as a Salesforce administrator, you want to equally divide these between the team.
“A round robin rule allows you to equally distribute new lead records without having to manually assign them using a rotation as shown below"
Craig Maxwell
Lead number (1) goes to SDR 1
Lead number (2) goes to SDR 2
Lead number (3) goes to SDR 3
Lead number (4) goes to SDR 4
Lead number (5) goes to SDR 5
Lead number (6) goes to SDR 1
Notice the rotation here? ☝
Lead number (7) goes to SDR 2
Lead number (8) goes to SDR 3
To achieve this in Salesforce you need to create 2 custom fields on the lead object, an auto number field and a formula field.
Read on and we’ll walk you through how to create and use these to automatically distribute leads and have your sales team thinking you’re some kind of magical Salesforce wizard... 🧙
To create the new fields go to Setup > Object Manager > Lead > Fields & Relationships and select New and choose the data type 'Auto Number' and hit 'Next'.
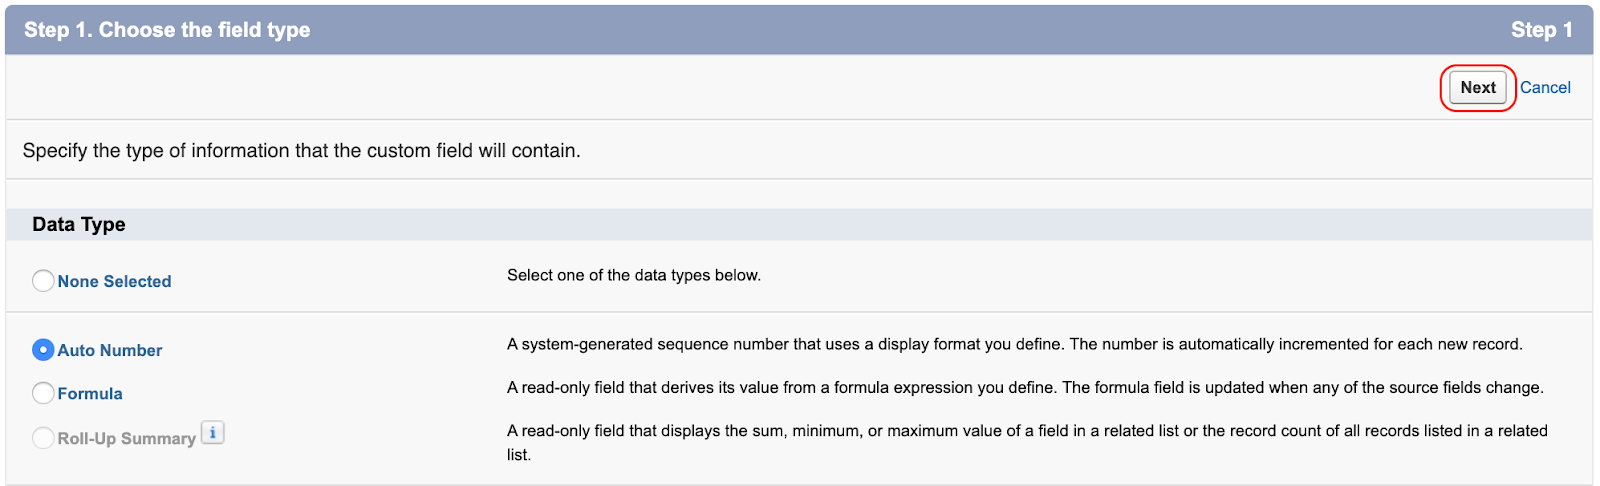
Creating the auto number field:
On Step 2 add in the following options:
Field Label: Lead Number
Display Format: {0}
Starting Number: 1
Field Name: Lead_Number
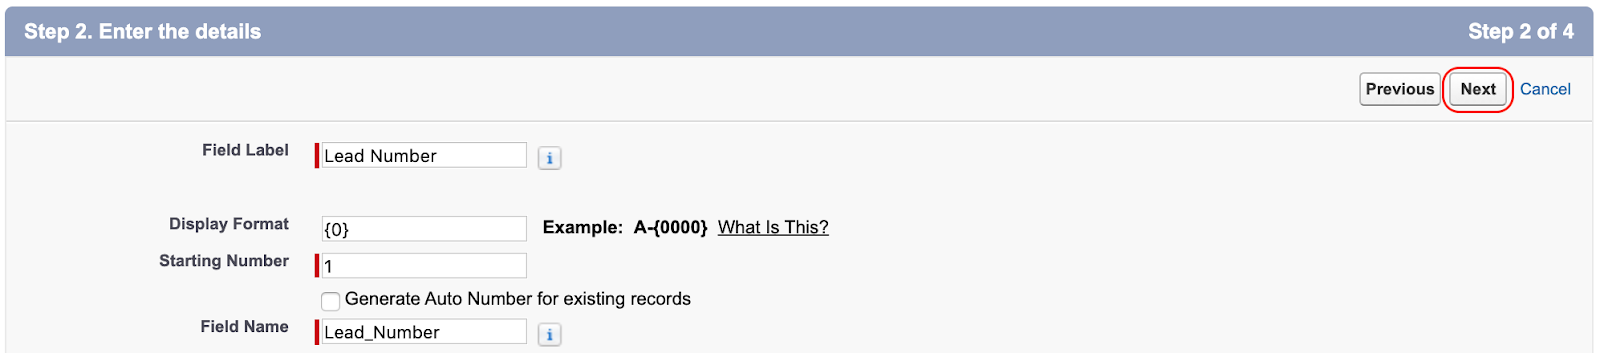
Building out the Lead Number options:
A unique number will now be assigned to this field for each new lead record created in a sequence.
Auto number fields are not editable by users, as new records are created this number will increase, the first lead '1', the next '2', and so on.
You may also see a checkbox to tells Salesforce to 'Generate Auto Number for existing records'.
If you need to assign existing records a number go ahead and check this box, leaving this unchecked will result in only new lead records moving forward will being assigned a number and routed.
Next you will need to create a new formula field that will take the auto number generated by Salesforce and assign it with sequential value that falls within a range you specify (It is this formula that makes the round robin rotation possible).
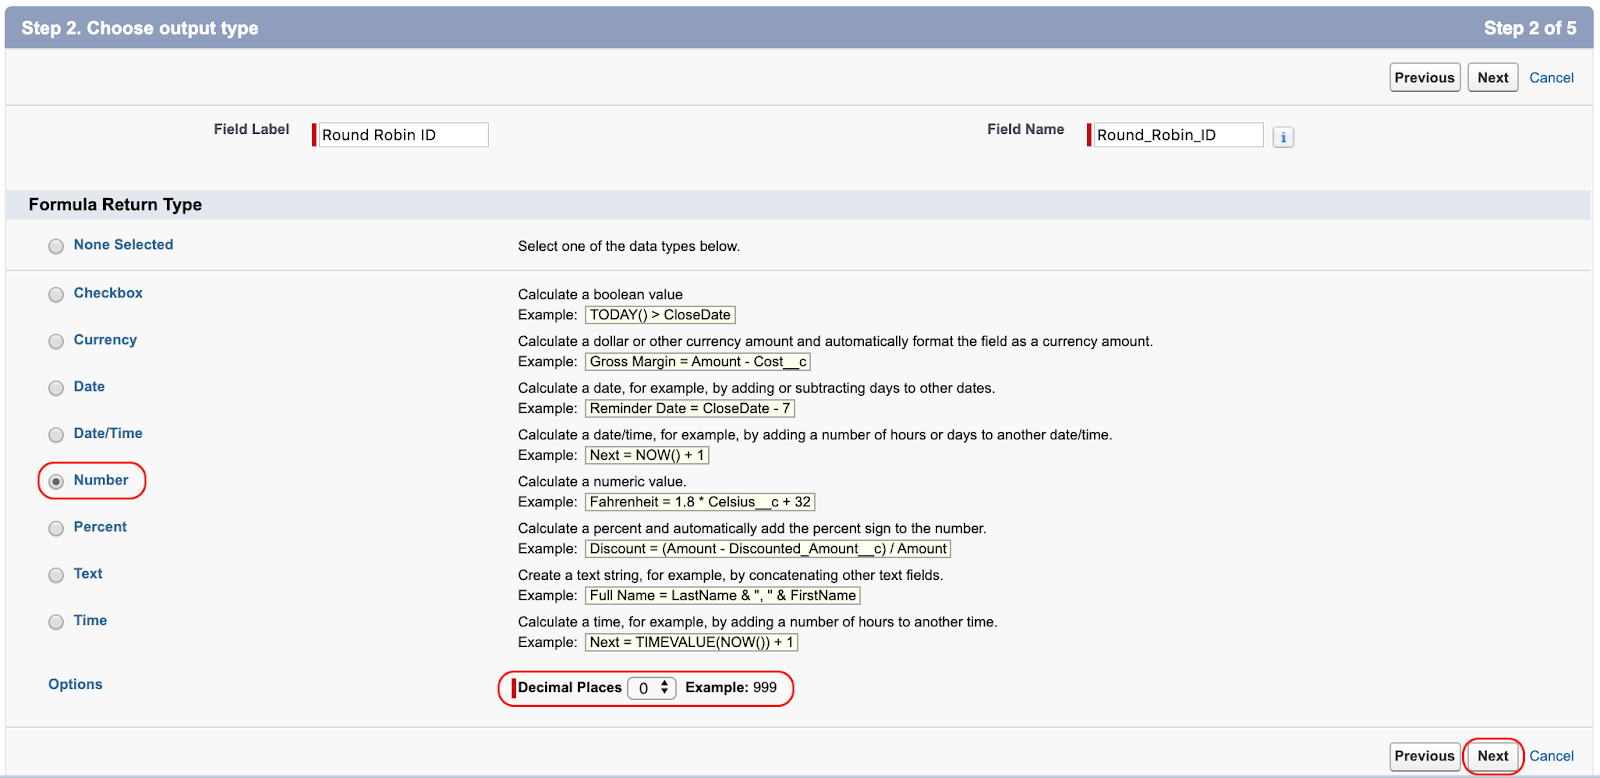
Create a new formula field with the following options:
Field Label: Round Robin ID
Field Name: Round_Robin_ID
Formula Return Type: Number
Options: Decimal Places = 0
Click 'Next'
Creating the Round Robin ID field:
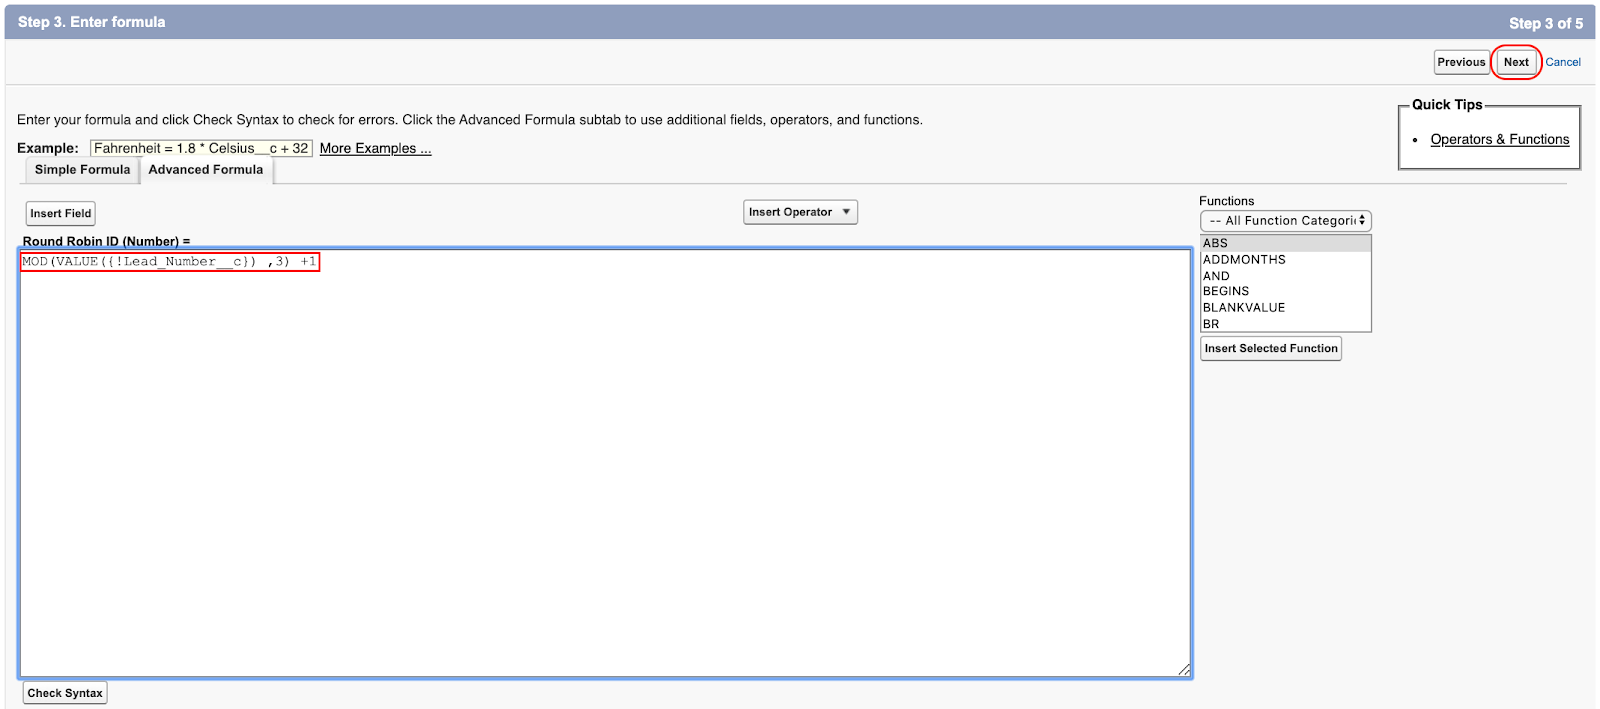
Select the 'Advanced Formula' tab and in the formula editor type in the following:
MOD(VALUE({!Lead_Number__c}) ,3) +1
Advanced Formula Settings:
This MOD function takes the "Lead Number" created earlier and applies a bit of math to only return a number within a specified range.
The '3' in this case means that it will only return the numbers 1, 2, or 3. If you were to change the '3' in the MOD formula here to '5' you’ll get a result of either 1, 2, 3, 4, or 5 as your Round Robin ID.
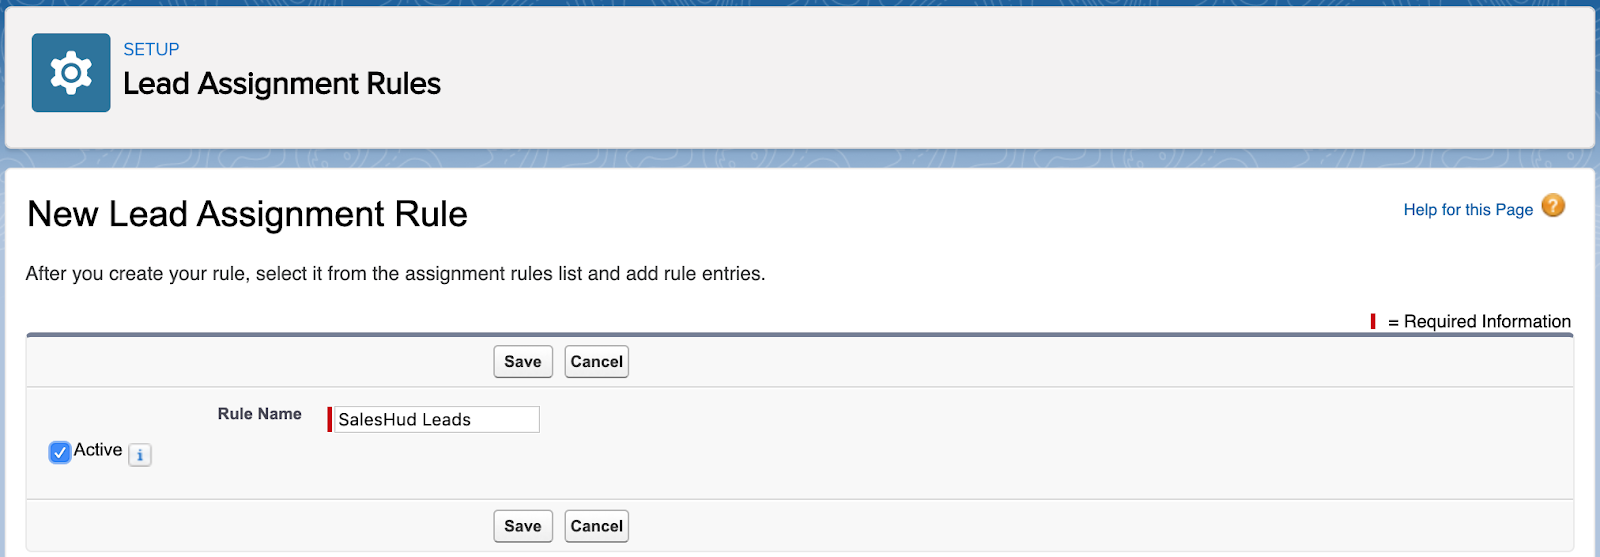
“Now that we have a method to tag each lead with sequential Round Robin IDs, we can use this ID to create a Salesforce Lead Assignment Rule."
Type 'Lead Assignment Rules' into the quick find search in setup and navigate to 'Lead Assignment Rules' and select 'New'.
Give your new rule a name, tick the "Active" checkbox and click “Save”.
Creating the lead assignment rule:
On the next screen click on the 'Rule Name' for the rule you just created and click the 'New' button.
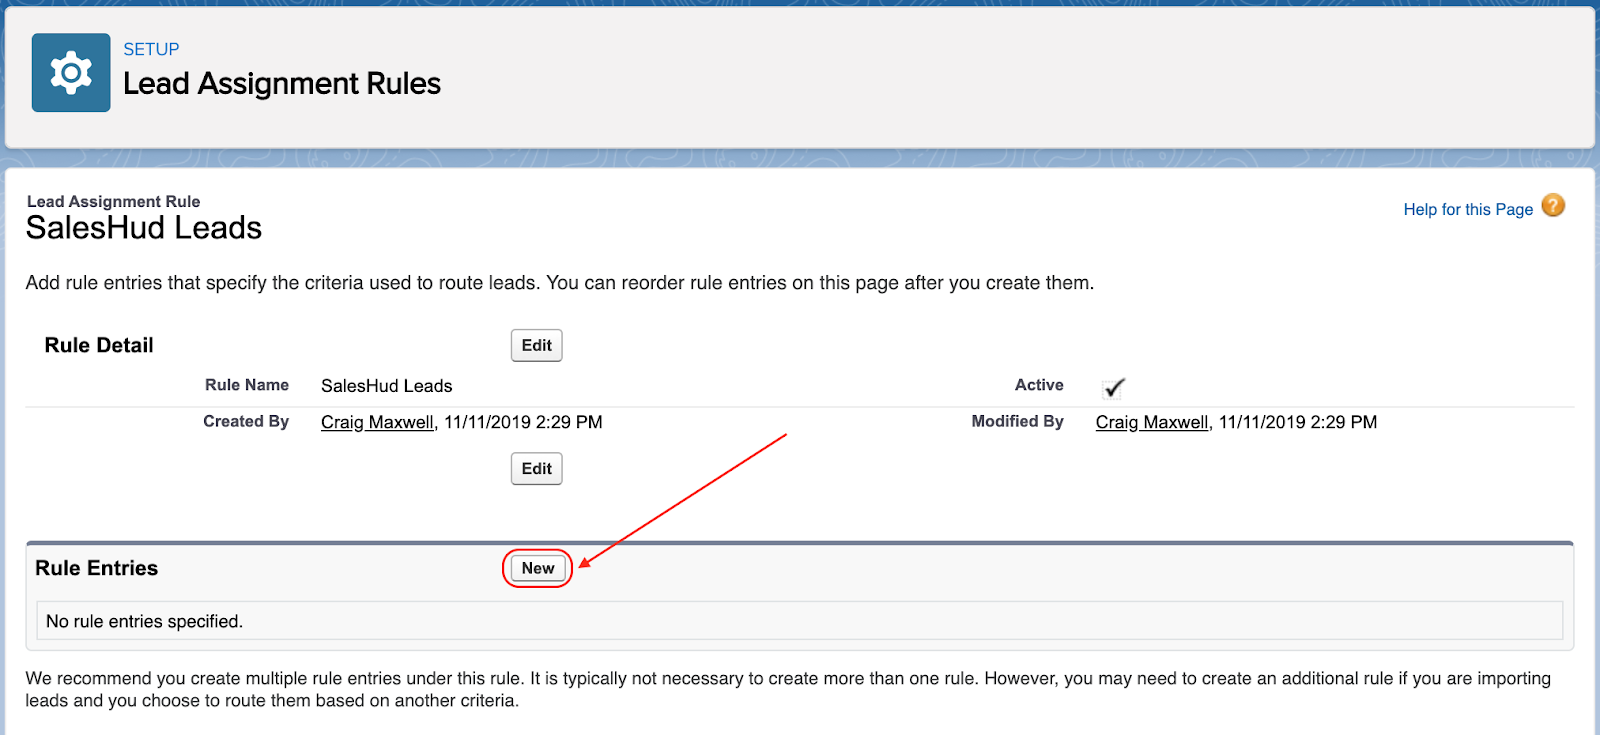
Lead assignment rule continued:
Step 1
Sort Order = 1
Step 2
Object = Lead, Field = Round Robin ID, Operator = 1
Step 3
Select the users to be assigned the lead and make sure to select an email template so that you are notifying the new owner of a new lead flying their way! 💥
Click 'Save & New' to create repeat these steps creating a rule for each rep that needs to be assigned a lead based on the Round Robin ID.
Bear in mind, the "Sort Order" sets the order in which your rules are evaluated.
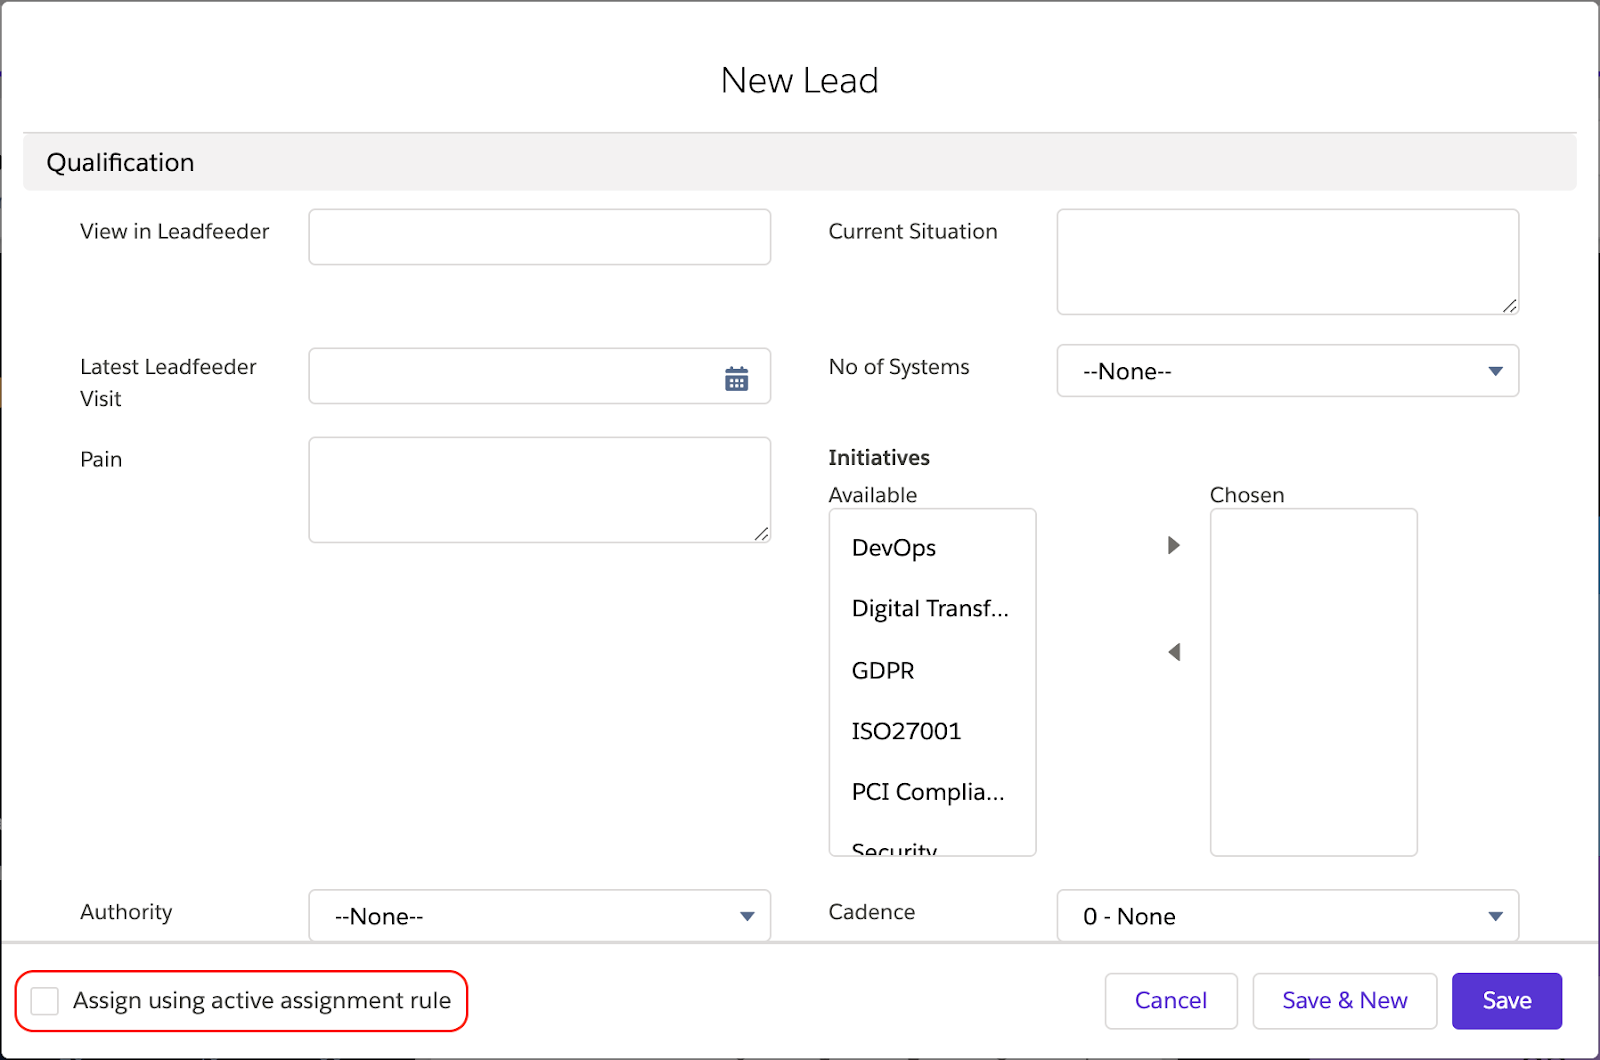
To test your new assignment rule, make sure your lead page under 'Layout Properties' has the 'Assign using active assignment rules' checkbox marked as 'Show on edit page.
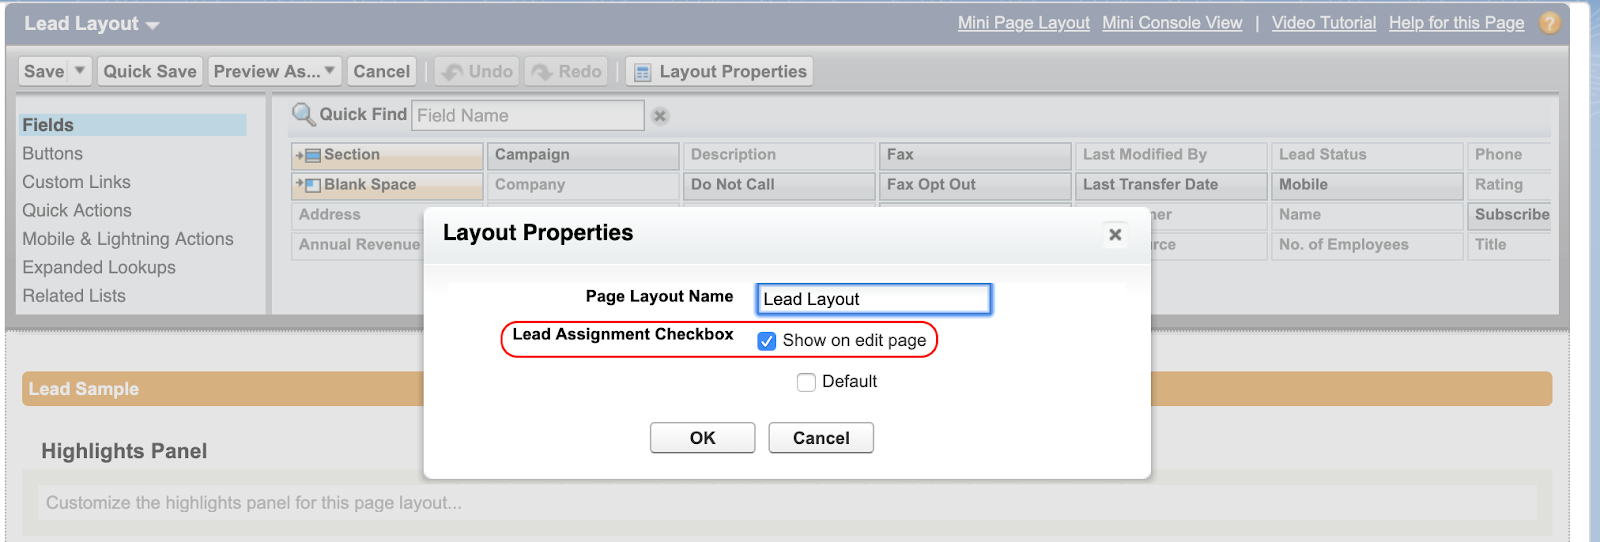
You can then create a new lead and check the 'Assign using active assignment rule' checkbox before saving to trigger your new assignment rule.